Saturday, February 16, 2013

Time to refurbish the Pop-Top

The winter months are far from ideal for camping in Oregon so we took one of the few sunny days to perform some upgrades. One of the disadvantages of living in Oregon is the issues with mold and being parked outside, the camper was not immune to this problem. After reading many solutions to the problem thanks to the Vanagon e-mail list and The Samba I decided to go all out and replace the canvas tent and refurbish the fiberglass pop-top.

The previous owner attempted to paint the roof but judging by the white paint that came off during each car wash I thought I would give it a try myself. Here are some before pictures of the roof and luggage rack:

The old canvas was in surprisingly good condition after 30+ years of use but it was the old "one-window" design and the zippers didn't work.
First up was removing the luggage rack:


As you can see the metal hooks on the luggage rack were all rusted and the paint faded. I also discovered old wasp's nests under each of the drain holes. The metal roof underneath had no rust at all but it was very dirty with alot of build-up.

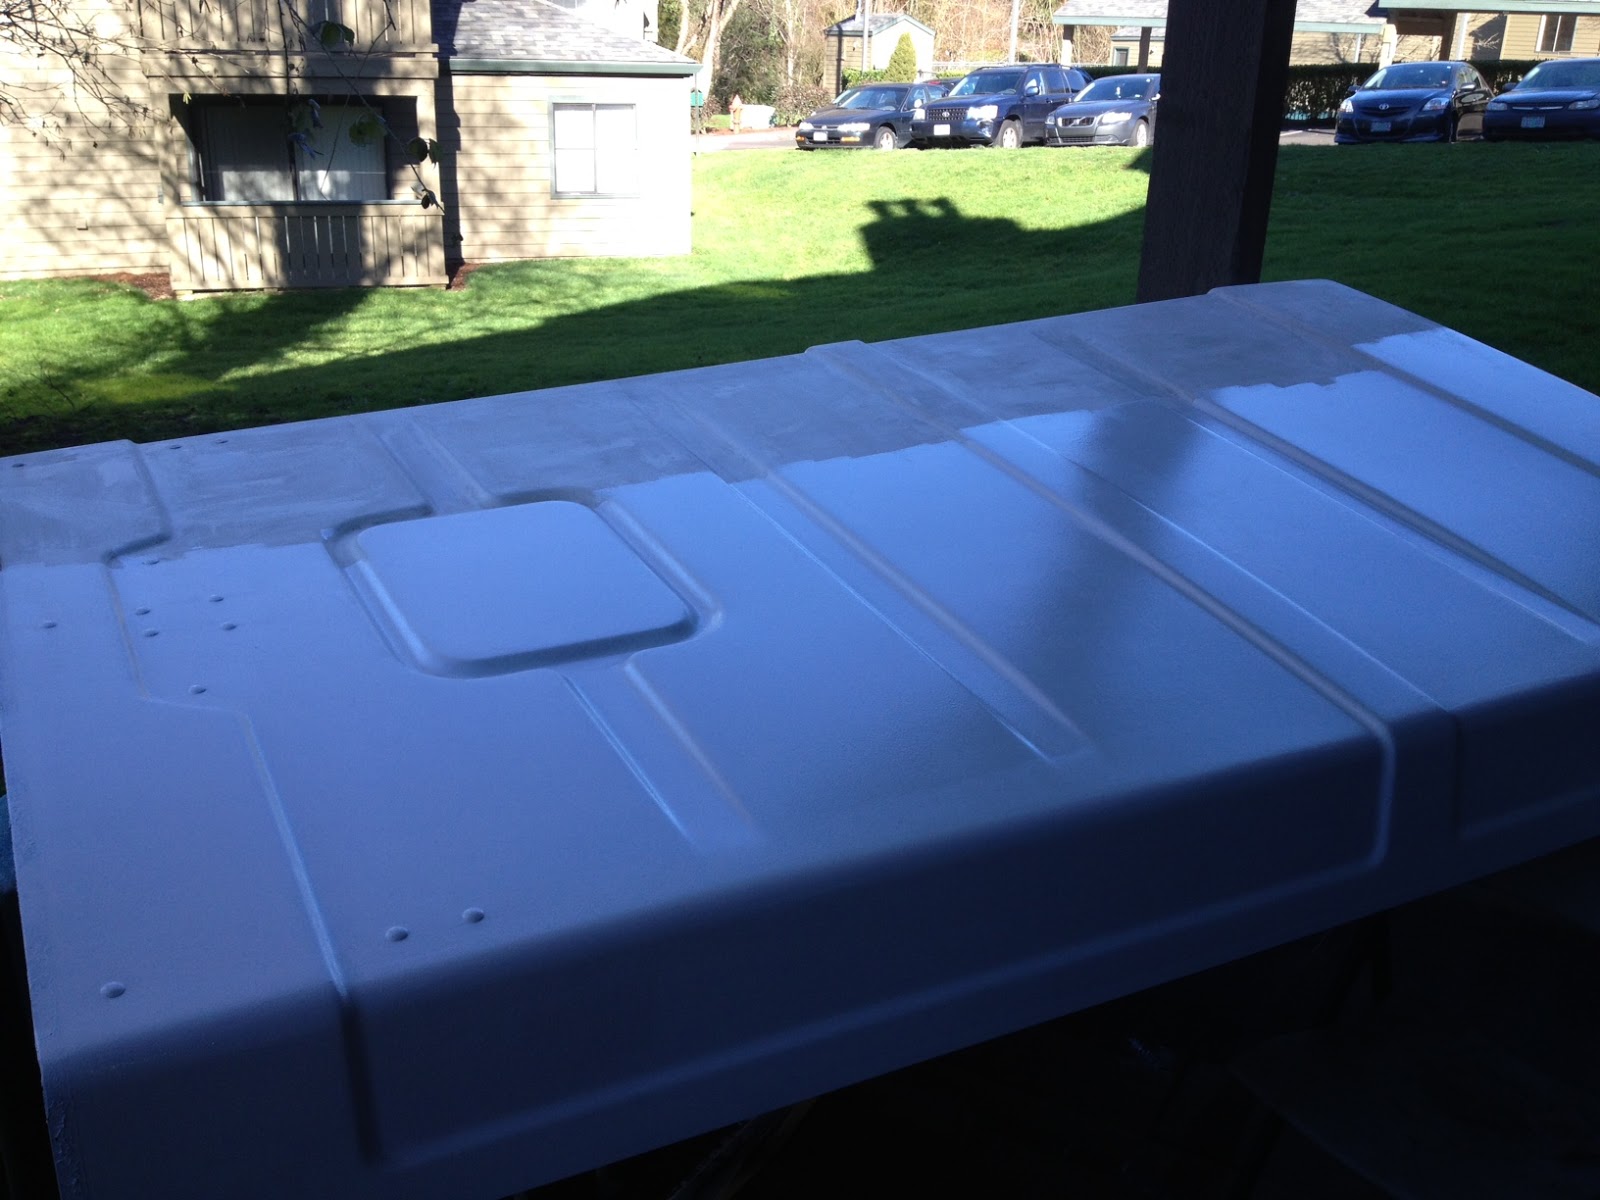
Here are some of the after shots:

A little NuFinish does wonders on 30 year old paint. I used a palm sander with 150 grit sand paper on the fiberglass and used one coat of Kilz premium primer followed by a coat of Behr Premium satin exterior paint. I think it looks great but only time will tell how well it stands up.

While I had the luggage rack off I decided to do some upgrades, below you can see the "new" tie-down hooks as well as drain hole screens:

The hardest step for the luggage rack was actually drilling out the old metal hardware due to them being riveted in. Once they were out, everything was sanded down and sprayed with Rustoleum and re-attached with stainless nuts and bolts. I also thought I would try something to minimize the issue of leaves and other build-up that accumulated under the rack and installed some convex metal screens. I purchased these garden hose replacement screens and glued them in from the bottom. I still think these will clog up but thought it was worth a try.

Unscrewing the bottom part of the canvas tent was straight forward but got a little cramped at the back. It also made me think how much harder it will be to re-install. Here are some shots of the front and rear canvas being removed.


I ordered a new 3 window canvas tent for the pop-top and all new seals from Bus Depot for the entire roof and the timing was pretty much perfect as the parts I ordered arrived on a sunny day. It is suggested that the roof be removed with a minimum of 3 people but I wasn't going to tell that to my wife. With her strength the two of us managed to take the whole roof off, go down a flight of stairs and place it on our front porch so I could work on it.
Here is the Vanagon with a nice open "sunroof", I don't think it looks nearly as good without the roof:
With the roof off it was time to get to the real work....first up was removing the mold issues. I had previously tried a non-toxic mold spray earlier that worked somewhat but left a terrible white film on everything so at this point I decided to use bleach. An empty spray bottle filled with 1 part bleach, 6 parts water and a little bit of laundry detergent was used in combination with a scrub brush. It did an amazing job and looked almost new while giving a nice fresh scent at the same time. I wanted to neutralize the bleach afterwards so used a 6-1 ratio of water and vinegar and sprayed it on afterwards
Here is the finished inside roof:
The older camper versions had a stapled canvas roof top and here is a shot of the plastic strips and staples (200+) that had to be removed.
A good before shot showing the condition of the roof:
Again, it was sanded with the palm sander, primed and painted with a soft roller.

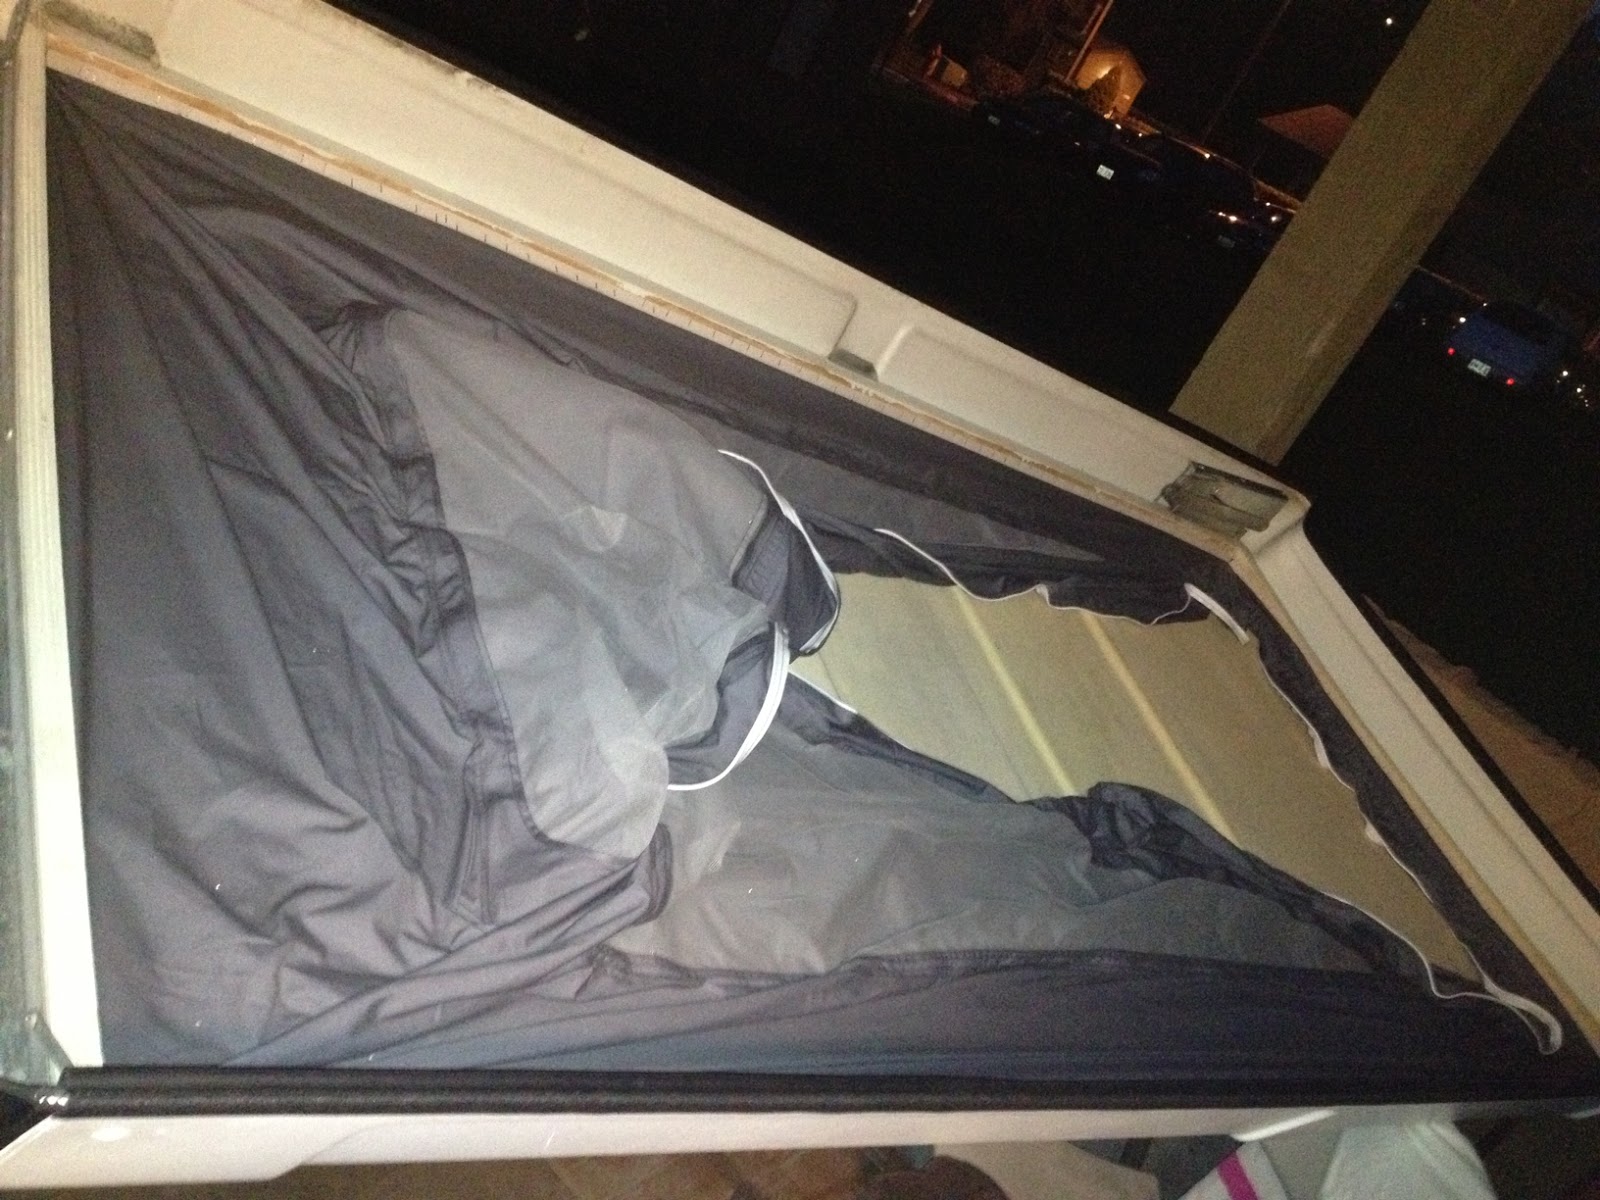
My goal was to have the new canvas installed and put back on the camper before nightfall so I used a hair dryer to speed up the drying process. At this point I could turn the roof over and staple in the top half of the canvas tent:
I bought a heavy duty Stanley staple gun which worked great but noticed that it was cracking the plastic strips. I then used the hair dryer again to warm the strips before stapling which worked great. As you can see it was dark outside at this point so I called upon the "She-Hulk" wife and we managed to get the roof back on for the evening:
I can't believe the amount of work we accomplished in one day!!!
And here it is the next morning! I have yet to get the corners screwed in and am confident that will straighten out the remaining wrinkles and tighten things up but had to stop due to the rain. All new seals installed as well as a new WESTFALIA sticker for the rear make this roof better than new.
Initially I was very hesitant to tackle this project alone and contacted a few vendors regarding other options and installation prices but couldn't justify the parts and labor costs. Overall, I am extremely happy with the end result as well as the quality products and prices from Bus Depot. We are ready and looking forward to our next camping adventure.

And here she is all complete. My fingers are raw after getting the four corners in and yes...the rear corners were extremely difficult. I think it fits perfect, the grey color gives it a more updated look and the extra side windows let in so much more sunlight.


Friday, November 23, 2012

What do you do when you have six days off in a row? Go on a camping trip to California of course. We started our journey on a Wednesday evening in Portland to eventually end up in San Jose. Our first night began in the dark so we stayed at a simple rest stop along the I-5. Nothing exciting and no pictures but it was comfortable and free. With the extra time and decent weather, we decided to head down the coast for part of the trip. After hitting Grants Pass we headed to the coast and down HWY 101 but it eventually went back inland due to the mountains. We wanted to spend the night by the ocean so took an extremely curvy road onto HWY 1 and stayed at the Westport beach KOA. We wouldn't normally stay at a KOA but it was getting dark and it was right by the beach.
We also managed to drop by to see our buddies Paul and Babe again along the way
 
This marks the first time we slept in the upper bunk which worked out great. We usually store our luggage and other things upstairs and sleep on the lower bunk but decided to try it out for this trip and it was surprisingly comfortable. Here's a shot of the new (and messy) master suite
This turned out to be quite a nice KOA mainly due to it's proximity to the ocean and we were fortunate that they only charged us a tent rate of $25 for the night which is quite a bit less than the $50 rates they wanted for a full RV site.

Time to hit the road and make way for our next pit stop in San Francisco.
A shot of some of the curvy roads we encountered
But then the skies turned gloomy and this is what we encountered by the time we hit San Fran. Our plan was to stop at the Golden Gate bridge but decided to wait until our trip home.
Eventually we hit our destination and of course the niece and nephew wanted to check out the camper


After a great visit with the in-laws it was time to head back home - we had some luck with great weather so stopped by for some sightseeing


I discovered the new Hankook tires emitted much less road noise than the old ones which allowed us to talk at highway speeds without yelling. I'll have to look into if there is anything that might be causing our poor fuel economy as one tank averaged only 14.2 mpg - I thought my normal 16-17 mpg was bad enough. The camper ran perfectly otherwise and overall this was a very successful trip.

Saturday, November 10, 2012

The weather forecast for northern Oregon and southern Washington called for some heavy rain so we decided to head a bit south for our next camping instalment. We knew we couldn't avoid the rain completely but were hopeful to at least experience some sunshine.  Detroit Lake State recreation area is a man-made lake created in 1953 by the U.S. Army Corp of Engineers and is located in the Cascade Mountains.  In the summer the lake has 400ft depths, is 9 miles long with over 32 miles of shoreline.  Once again we arrived in darkness so had to wait till the next morning to see this beautiful park.

It rained for most of the first night so the top was down, above are some shots of our site. While waiting for the sun to arrive, it was time to go exploring! I discovered that they lower the lake level in September to compensate for the extra rain in the fall/winter. It was an eerie site to walk on what is normally the lake bottom with 60 year old tree stumps looking as tho they had just been cut down
Here are some more shots we took while exploring the area


Another cool close up shot of some stagnant water
Of course the sun did make a few appearances and we were able to lift the top for a while


We will definitely be visiting this park again next summer as we soon realized that boating and water activities are the major attractions when the lake is at a higher level. Only one of the camping loops were open in November and there were only two other campers which made for a peaceful weekend of fun.

We are planning a big camping trip next week to San Jose so we performed some basic upgrades in anticipation of the 1,500 mile round trip. Here are some shots of our new headlights and brand new Hankook RA08 tires. Stay tuned for more updates when we get back!

Tuesday, October 23, 2012

Yet another impromptu camping outing - this time at Viento state park. About 1.5 hours East of Portland so we were able to arrive before 8pm and cook our dinner. We had two concerns being the cold temperature and the rain. We had been extremely lucky this past summer with the lack of rain but our luck ended for this trip. Here she is getting some last minute groceries before our trip
After looking into different heating options between propane or electric, I decided to purchase a small ceramic heater from HomeDepot for only $23
Although this limits us to visiting sites with electric hook-up this winter, it kept us very warm and we can use it in the apt as well. I might go the propane route next year depending on how much we like cooler (winter) camping. Viento was a nice campsite with clean(ish) bathrooms and warm showers, $16 per night was the discounted discovery season rate. After a night of heavy rain with the pop-top down, we were eventually treated to some sunshine.

Of course the rain did come again and because it is still the original canvas top, we spent most of the weekend with the top down to avoid it getting wet. Below is the day's entertainment, I don't encourage anyone to get this beer tho - it was crazy strong
Viento park is right by the gorge with close river access which was great but the bad side of that being the proximity to the noisy train tracks. Excellent short hikes netted us a great view as well as some fancy new coins courtesy of the passing trains.


Thursday, October 18, 2012

Our next camping installment (and maybe our last for the season) was at Cape Lookout State park. October is considered "Discovery Season" with the Oregon State parks which means the camping rates are discounted. We decided to really test out our new house battery set-up this time and utilize the tents sites offered at this park. We arrived after dark so took the first site available. Here is a shot in the morning of our initial set-up
We chose this park due to it's proximity to the ocean as well as the sunny forecast for the next 2 days. You might notice the steam on the windshield due to the outside temperature dropping to the 40's overnight. After biking around the park we discovered a perfect site that was literally 20ft from the ocean so we moved off to our second camping day.
Our site was on a corner and only $13 with the beach right on the other side of the bluff!

There were a few hiking trails to the end of the cape and although we originally thought we could bring our mountain bikes we soon found out that they weren't allowed (not to mention impossible to navigate). Here are some shots we took along the way


10 miles round trip and 5 hours later it was time for some frisbee and a beautiful sunset to end another awesome camping experience

After 2 days, I did find that the house battery did not have enough power to charge my laptop for the second full movie and had to start the camper for a while for it to re-charge. I might look into adding a second or larger battery in the future. Interior mods for this month are the new front door speakers and a new Shur-flo water faucet which worked great!