All the air leaks are fixed and she is running almost like new. The difference was night and day! Intake hoses were either replaced or sealed up, new fuel injectors, new fuel lines, cold start valve and sealed up the intake manifold.
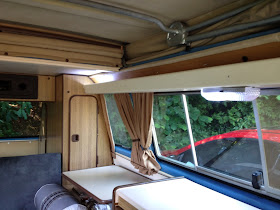
Decided to take a longer camping trip this weekend to Ft. Stevens State Park. We were too late to do reservations on-line so took our chances on availability upon arrival. We were lucky to get a spot for the first night with full hook-up just before the sun went down. This is using our little IKEA light which lights up nicely.
It was cloudy or raining for most of the weekend but we were still able to enjoy the park. Here is a shot of Coffenbury lake
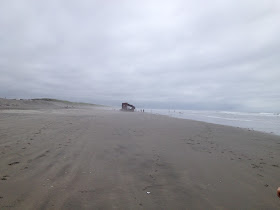
We were then able to check out the beach and the shipwreck Peter Iredale
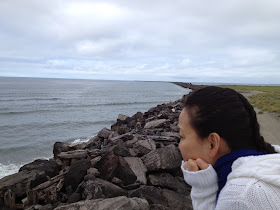
At the tip we were able to see the Pacific ocean and the mouth of the Columbia River
And on the way home we were able to stop by Seaside
Despite the wet weather, it was a great weekend, the camper was still doing 40-45mph over some of the mountain hills but ran great otherwise. Next camping trip we are hoping to hit Bend, Or.
Friday, July 27, 2012
Friday, July 20, 2012
I ordered some new seals as well as the air intake boot that arrived the other day. Hopefully the camper will be ready by next week for some more camping. Something else arrived in the mail this morning which is one part of a larger project I have in mind for the future. Here is a sneak peak of what's in store.
I couldn't pass up the one day only deal - brand new polkaudio 10" sub for $29!
Another idea I have in mind is covering up some of the cabinetry with a textured vinyl flexible carbon fibre wrap. The good news is I can try it and if it doesn't look right - then I'll just remove it. Here are some pics of what I'm talking about
The area under the rear bench is the place I'm thinking of trying my first piece
Wednesday, July 11, 2012
We decided to take one more improptu camping excursion prior to taking the camper to the mechanic to get some much needed fine tuning. Discovered Spruce Run Campground that is just off HWY 26 about an hour's drive west of Portland. There was no electric or water hook-up but has flush toilets in the summer and was only $10 per night.
This was a good test of the camper without any hookup and everything worked great. We used the sink for washing all the dishes as well as for cleaning and only used approx 5 gallons. We also didn't know how much propane was in the tank so had it filled. Turns out it only needed 2.8Gallons so we weren't even close to empty but at least we now know it is full. The fridge started up right away on the first try as well and kept all our food nice and cold. I even had to turn it down from the maximum as things were starting to freeze up.
Campfire a blazing and all ready for our second night of camping fun. The site was also right by the river and we could hear frogs singing all night. We also got to try out the new LED lights which were amazingly bright. The front kitchen light fully lights up the sink and stove and the rear light was perfect for reading. I am still working off the single battery and had the lights on for over an hour with no issues
This a great night shot of how bright the LED's are
Monday, July 9, 2012
This morning I took a trip to Radio Shack to pick up some wire and a switch so I could hook up my second LED light. Total cost for this mod was under $10 for a spool of 24 gauge wire and a switch
It was also a great opportunity to work on my awesome soldering skills
Decided to use the wires from the kitchen light. The hardest part was feeding the new wire down through the hole
Got it working - nice and bright!
Looking directly at the light was too bright so instead of getting a diffuser I decided to hide it in the tray at the back. I'm hoping it will make a nice reading light at night.
Both LED lights in the daytime
Here it is in the tray. Just have to decide how to mount the switch properly.
I'll post another picture tonight when it gets dark
Sunday, July 8, 2012
So I was reading up on LED lighting for the interior and came across this on eBay which just arrived in the mail
Took a few weeks to get it mailed from China but you can't beat $2.89 so I ordered 2 of them. Comes with 3 types of connectors but the dual metal prongs fit perfectly in the kitchen lamp over the sink
It's a 48 LED rectangle with 2 sided tape on the back. Much brighter than the stock unit while creating no heat and uses much less power.
Brightens up the interior quite nicely at night. I'm thinking of attaching the second one I bought further towards the back and facing up so the light will reflect off the ceiling.
Just returned back from our 3rd camping experience with the new cushions and it was much more enjoyable. Did some finishing touches with new cushions bedding and carpet. Also ran the fridge on AC power which was nice and frosty cold.
A "single size" fitted sheet fit perfect as did the single duvet and cover. Also found a nice shag carpet for the floor. Total cost for these finishing touches was around $130
Some shots of our 3rd camping experience at Metzler park. $21 per night which included water and electricity. Next camping trip will be at or near the beach!
A little home theatre action via the laptop and exteranl speakers did a great job
Our second camping experience was at yet another KOA in Cascade locks at just over an hour east of Portland. I think KOA caters to larger RV's as we were by far the smallest one yet again. They do offer free wireless internet and cable TV along with the normal water and electric hook-ups. On this trip I managed to use the stove for the first time and got the fridge working on propane. I have read this a quite an accomplishment as the fridge has not been used in a few years.
I also filled up the water tank so everything was working great.
I also filled up the water tank so everything was working great.
My overall goal is to modernize the interior so next up was to reupholster the rear bench/bed cushions. After deciding that doing this myself was out of the question, I took the cushions to Beaverton Auto Upholstery. I also bought a 2.5" gel memory foam mattress topper from Costco to add on top of the original cushions. Here are the end results after deciding on a dark graphite grey suede fabric
Here is the new side armrest installed. I took the oportunity to spray the rear side panels with black matte paint. I originally wanted to get new panels and cover them in fabric but the spray can black doesn't look too bad for now...we'll see. I also picked up a 3'x4' door mat that fit almost perfectly over the engine cover for $11 at Home Depot
New rear bench installed
The edges are a little more rounded than the original cushions but it is much more comfortable
Quite happy with the work from Beaverton auto upholstery. They charged $425 for the 3 main cushions and the arm-rest. The gel memory foam mattress topper was another $99 from Costco. So a whole "new" rear bench/bed for just over $500 isn't too bad in my books
Next on the list was to attempt at using my limited mechanical skills to get the engine running properly. Here is a picture after the parts arrived from BusDepot.com
Simple "tune-up" parts included new cap, rotor and air filter. I wasn't the most comfortable working with fuel lines but managed to replace the injector seals and new air-flow meter. The rest I'll leave for my mechanic to finish and fine-tune.
Simple "tune-up" parts included new cap, rotor and air filter. I wasn't the most comfortable working with fuel lines but managed to replace the injector seals and new air-flow meter. The rest I'll leave for my mechanic to finish and fine-tune.
Next up is to get rid of the 30 year old brown carpet and install some dark wood style vinyl flooring.
Normally this color is special order but I just happened to come across this one box at HomeDepot for $38. It tucked nicely under the cabinets without having to lift them and is screwed down on one side with the silver sliding door trim.
I highly reccomment the Allure flooring as it was very simple to cut and install. All I needed was a tape measure, knife and straight edge. Total time was approx 2 hours and the longest time was removing the carpet from under the cabinets as I didn't want to lift them out.
Here is some of the debris that builds over 30 years from the rear bench. I also found 2 bullets from a .357 Magnum along with unlimited dog-hair and kibble! The biggest improvment after this upgrade is there is no more "old carpet" smell and it is super quick and easy to clean.


